Tutorial using: Proxmox VE 5.0-23/af4267bf
Add new Physical Hard Drive to your Proxmox Node.
Log in to Promox web portal
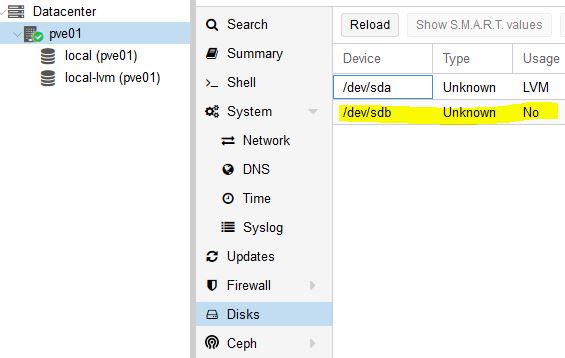
Select correct Proxmox Node and click on Disks

You can see new Physical hard drive is showing /dev/sdb
Open Proxmox VE Node’s Shell

Use fdisk command to create partition
root@pve01:~# fdisk /dev/sdb

Welcome to fdisk (util-linux 2.29.2).
Changes will remain in memory only, until you decide to write them.
Be careful before using the write command.

Command (m for help):
Create new partition type n and hit enter
Command (m for help): n
Partition type
 p primary (0 primary, 0 extended, 4 free)
 e extended (container for logical partitions)
Select partition type p for Primary and select default value for Partition Number, First Sector and Last Sector.
Partition number (1-4, default 1):
First sector (2048-16777215, default 2048):
Last sector, +sectors or +size{K,M,G,T,P} (2048-16777215, default 16777215):

Created a new partition 1 of type 'Linux' and of size 8 GiB.
Save partition – type w and hit enter.
Command (m for help): w
The partition table has been altered.
Calling ioctl() to re-read partition table.
Syncing disks.
Now new drive is ready. Using following commands we are going to create LVM Volume.
Create Physical Volume
root@pve01:~# pvcreate /dev/sdb1
 Physical volume "/dev/sdb1" successfully created.
Create Volume Group
root@pve01:~# vgcreate newdrive /dev/sdb1
 Volume group "newdrive" successfully created
Now add LVM to Proxmox
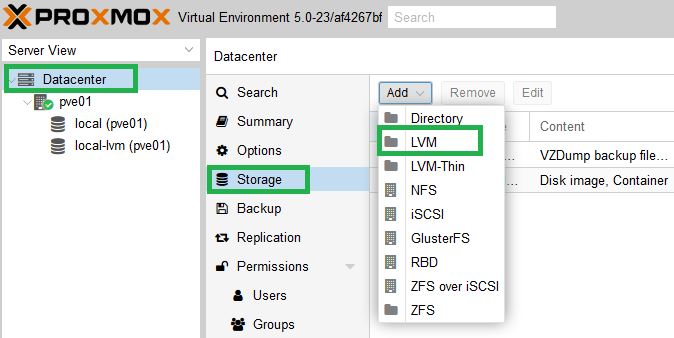
Go to Datacenter –> Storage –> LVM

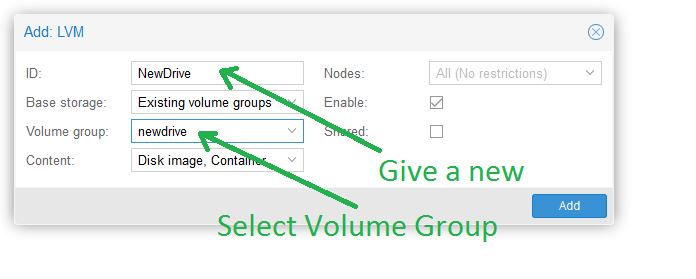
Give a new name for the storage, select correct volume group from drop down and click on Add.

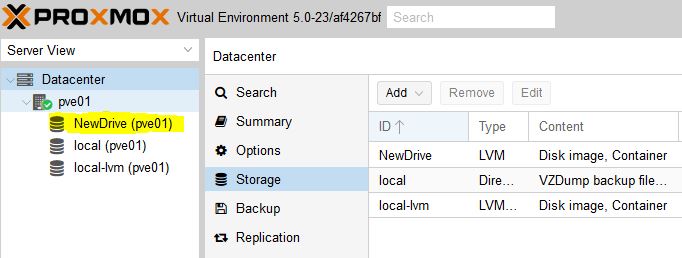
New drive has been added to Proxmox Successfully.

